

How To Draw Baby Pooh Bear
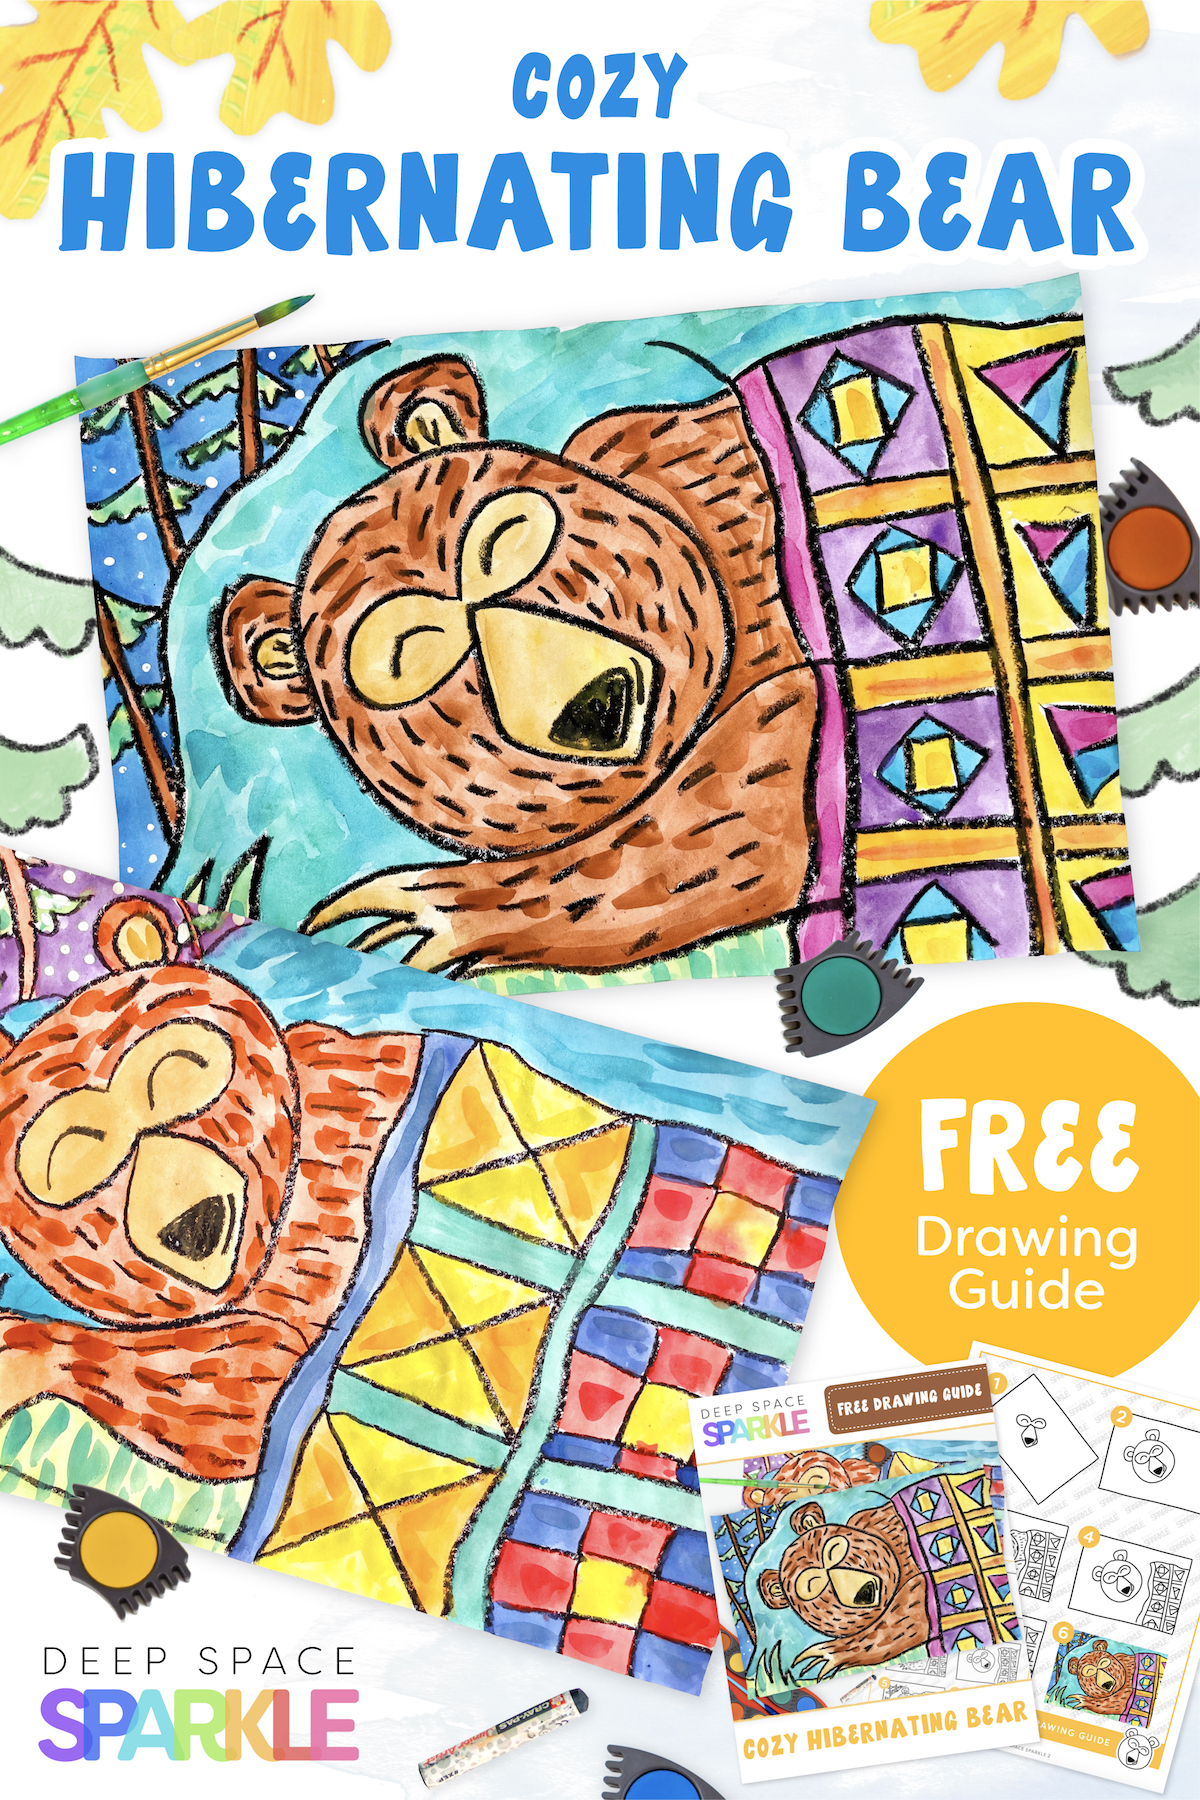
Who doesn't love snuggling up on a chilly winter night? As the days start to get shorter and colder, this hibernating bear will have you dreaming of cozy winter nights bundled up under your favorite quilt.
Featuring simple materials, this lesson can be done in one class period and is best for students in second grade and up.
Download this handy drawing guide before you get started.


THIS IS WHAT YOU'LL NEED:
– 12″ x 18″ white sulphite paper
– Black oil pastel or crayon
– Cake tempera (pan watercolor works great too)
– Medium round paintbrush
– Q-tip
– White liquid tempera paint
DRAWING THE BEAR
Turn the paper horizontal. Angle the paper so that the top left corner of the paper is pointing upward. This will allow students to draw the bear's head straight on, but when they slide the paper back to its normal position, the bear's head will be angled.
Draw the eyes, nose and mouth near the center of the paper with a black oil pastel. Add a big circle around the facial features for the head. Add two curved ears on top.
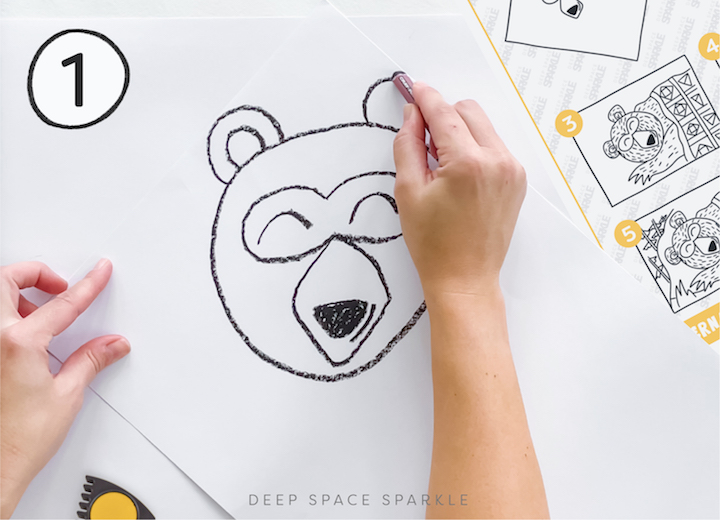
Straighten the paper back up.
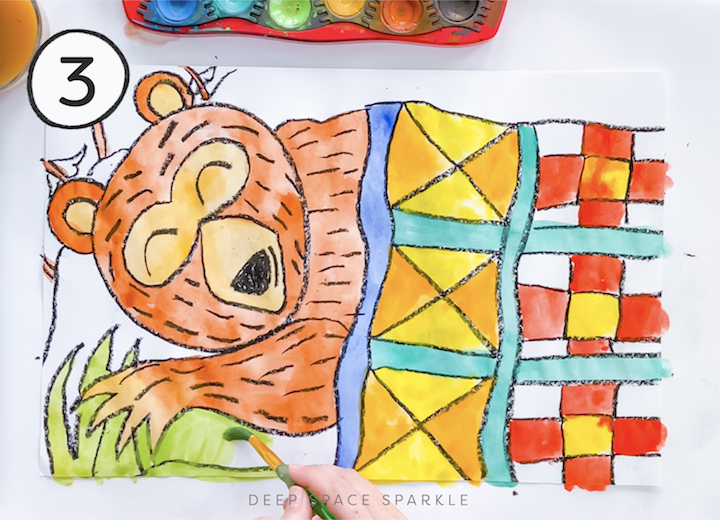
Add a slightly curved vertical line from the bottom of the page for the quilt, stopping before you get to the top of the paper. Leave some space between the bear's head and this line. Draw a curved horizontal line to the right side of the paper to finish off the quilt.
Divide the space in the quilt into square sections and add geometric shapes inside to create your own unique pattern.
Draw the bear's arm curling under its head and a curved line for the back.

Add a curved line for the bear's cozy cave up and around the head. On the ground below, draw grass.
Draw some simple pine trees in the background.
ADDING TEXTURE
Adding a fur-like texture to the bear is as simple as drawing lines. Use your oil pastel to draw short lines on the bear's face, arm and body. Think about the direction that the fur would grow, especially on the face.
ADDING COLOR
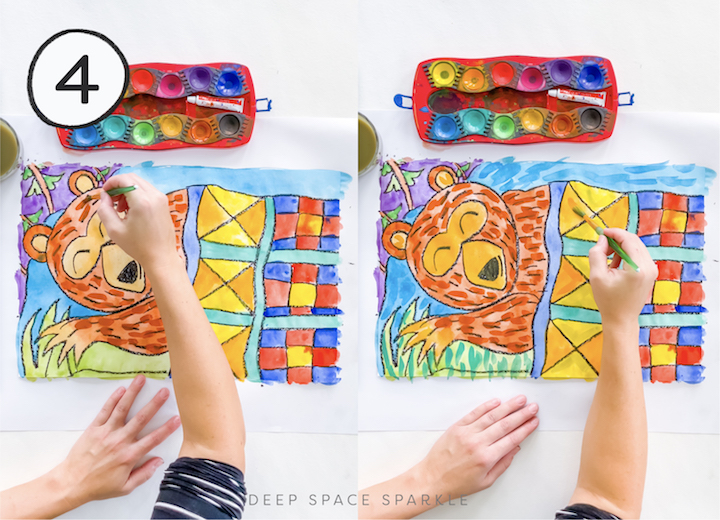
Paint the bear, quilt and background using cake tempera paint. Watercolor works well too, but I chose cake tempera because it dries very quickly.
To add a bit more dimension and texture, add short lines on dry areas using less water on your paintbrush to create darker colors. To get even more vibrant colors, swirl your paintbrush around in the paint for a few extra strokes.
As a final step, dip a q-tip in white paint and stamp some snowflakes falling in the night sky. You can add some snow piling up on top of the pine tree branches, too.
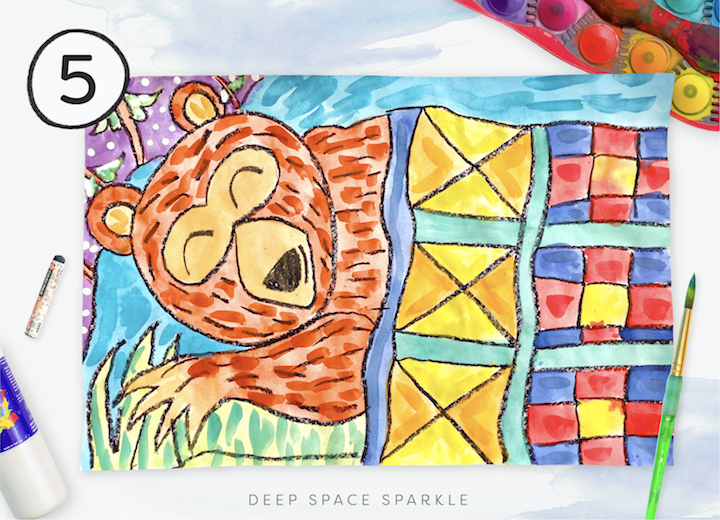
Now your bear is ready for a cozy winter slumber!
Want more in-depth lessons with accompanying standards and assessments for similar projects? The Sparklers' Club has thousands of fully standardized lesson plans to make curriculum planning effortless. Join the waitlist for the Sparklers' Club !
This post was created and written by Team Sparkle's, Heather Sparks!

Pin me!
How To Draw Baby Pooh Bear
Source: https://www.deepspacesparkle.com/cozy-hibernating-bear/
Posted by: boothbyfirad1964.blogspot.com
0 Response to "How To Draw Baby Pooh Bear"
Post a Comment